 Skip to content
Deck Building Permits in MA: A to Z Guideline for Massachusetts Homeowners

Living in Massachusetts? And planning a new deck for your backyard? Regardless of whether you intend to construct a deck extension, you must know the applicable requirements for deck building permits in MA.
According to the Massachusetts State Building Code (780 CMR), any deck that is attached to your house, exceeds 30 inches from the ground, or is larger than 200 square feet needs a permit. Any other kind of platform is exempt from this.
The problem lies in this one provision, which many residents are unaware of. If you live in the town of Acton, where it is strictly implemented by the building department, then you might run into trouble if you don’t know about it. Below you can find the information on how and when you need a permit for deck construction in MA and what it means.
Do You Need a Permit to Build a Deck in Massachusetts?
Yes, for most people. The permit requirement for decks in Massachusetts does not change in any city or town in Massachusetts, as the state building codes are applied equally throughout the state. However, the fees may vary based on local zoning requirements.
The following is an outline of when a permit is required and when it is not.
| Deck Feature | Permit Required? |
| Attached to the house (ledger board connection) | Yes, always |
| More than 30 inches above grade at any point | Yes |
| Larger than 200 square feet | Yes |
| Includes new footings, posts, or structural framing | Yes |
| Freestanding, under 200 sq ft, under 30 inches high, not attached, not blocking an exit door | No |
When your construction project satisfies any of the “Yes” criteria, then a building permit is required prior to construction beginning. This holds true whether your construction project includes the construction of a deck on the back of a home or the addition of a small platform off a side door.
What Size Deck Can You Build Without a Permit in Massachusetts?
One of the most common questions searched for by homeowners is whether or not a deck requires a building permit, which turns out to be a much more restricted category than homeowners usually think. To be exempt from a building permit, a deck should meet all four of the following requirements simultaneously:
- It must be located entirely on the ground without being attached to the house
- It must not rise above 30 inches at its highest point
- It should occupy no more than 200 square feet
- It should not be used as an escape route for any door of the house
As can be seen, this requirement is designed for decks that have nothing to do with backyard landscaping. From the moment you make the deck attached to the house, raise it above 30 inches, or make it larger than 200 square feet, the deck will require a building permit according to Chapter 780 CMR, the Tenth Edition of the Massachusetts State Building Code.
Understanding Deck Building Permits in Massachusetts
What Is a Deck
…How to Remodel a Small Bathroom on a Budget

A small bathroom doesn’t have to feel cramped, outdated, or expensive to update. With thoughtful planning and a few budget-friendly improvements, you can create a space that looks larger, functions better, and adds value to your home without taking on a full-scale renovation. One of the best renovations you can make in your home is a bathroom remodel. The great news is that you don’t have to go through an extensive remodel to make over your place if you are looking for small bathroom remodel ideas on a budget. These easy fixes, such as changing fixtures, adding storage, refinishing, and replacing lighting, can really make a difference in how your room looks and works and are quite affordable.
In this bathroom remodel guide, we’ll offer some practical, inexpensive remodelling ideas; highlight features where you can spend and save; and show how to make a bathroom feel bigger, brighter, and more contemporary, all without breaking the bank.
Why a Small Bathroom Remodel Is Worth It
Bathrooms are one of the most used rooms in any home. Even small improvements can make a difference to your daily routine and add value to your home.
Increase Your Home’s Value
A modern bathroom is also usually one of the first things prospective buyers see.
A strategic remodel can:
- Give you better resale potential.
- Update the style of your home.
- Boost buyer confidence.
- Improve overall equity value.
Even if you aren’t planning to sell, a well-designed bathroom improves your home’s comfort, functionality, and long-term value.
According to the 2025 Remodeling Cost vs. Value Report, a midrange bathroom remodel recovers a significant portion of its cost at resale, making it one of the most valuable home improvement projects.
Improve Daily Comfort
Outdated baths typically have inadequate lighting, minimal storage, and cramped spaces.
A thrifty makeover can do all this and more:
- Capture more space
- Help you order
- Light up a bit – and
- Turn the bathroom into a cleaner, more welcoming place.
A few changes can go a long way toward making your bathroom feel both bigger and more comfortable to use.
Decrease Future Maintenance
Early replacement of worn fixtures and spoilt materials can save you from more costly repairs later.
Treating things like leaky faucets, crumbling caulk, or old flooring can increase both looks and longevity.
Set a Realistic Budget Before You Begin
Every successful remodeling project starts with a clear budget.
Knowing how much you’re willing to invest helps you prioritize improvements that deliver the greatest value.
Focus on High-Impact Changes
When planning a small bathroom remodel on a budget, consider upgrades that provide the biggest visual improvement for the lowest cost.
These often include:
- Fresh paint
- Updated lighting
- Modern hardware
- New mirrors
- Refinished cabinetry
- Water-efficient fixtures
These updates can completely refresh a bathroom without requiring major structural work.
Know Where to Save
One of the easiest ways to reduce remodeling costs is to keep the existing layout whenever possible.
Moving plumbing or electrical systems often becomes one of the …
Master Bathroom Remodel Trends 2026: Top Design Ideas, Costs, and Expert Tips

If remodeling is your agenda for this year, master bathroom remodel trends 2026 revolve around one principle – your bathroom needs to be a spa rather than just another room in your home. Wood vanities, walk-in curbless showers, and soothing neutral color schemes are preferred choices rather than bright white spaces that were favored during the previous decade.
The 2026 Bath Trends Report conducted by NKBA found that 96% of designers prefer neutral color schemes, and wellness features are increasingly being added into bathroom designs.
In this guide, we take a look at the design trends, cost estimates, and ideas surrounding master bathroom remodeling in 2026 that will look good even a decade later. The bathroom remodeling professionals of Exponential Construction Corp can help you realize any of these ideas.
What Are the Master Bathroom Remodel Trends for 2026?
Master bathroom remodel ideas for 2026: opt for warmth, textures, and individuality as opposed to the sterile look of all-white bathrooms that were popular in the late 2010s. Picture wooden vanity cabinets, rounded plumbing fixtures, natural stone materials, and high-tech products that work in the background rather than trying to draw attention to themselves.
If you have been browsing bathroom remodeling ideas in 2026 online, you have most likely noticed the consistency of such trends among different designers and locations.
This new approach has much more significance beyond aesthetics. When a bathroom is tailored to your real needs and lifestyle, rather than a temporary trend, it will look good for years and maintain its value. According to Houzz, searches for “wellness room” increased by 164 percent and searches for “biophilic design” increased by 112 percent year-over-year.
The advantage that comes with embracing the current trends has nothing to do with resale value alone, but in fact, a carefully planned renovation will get a substantial amount of its investment back. This is all about practicality.
The master bathroom is one of those few spaces that you utilize on a regular basis every single day, especially first thing in the morning or before going to bed, which means that minor annoyances such as a small shower or poor lighting add up over the years.
Top Bathroom Design Trends 2026
This is a quick preview of the most important bathroom trends that 2026 will bring to master baths, which will be followed by an overview of those that require further attention before starting your renovation.
This is exactly the set of trends you will come across when looking through most contemporary bathroom trends either on Pinterest, Houzz or in showrooms. For a brief overview of modern bathroom trends, refer to the table below.
| Trend | What It Looks Like | Why It Matters |
| Wellness and spa features | Wet rooms, steam showers, chromatherapy lighting | Supports the 36% of remodels now including a wellness feature |
| Warm wood vanities | Wood-faced cabinetry over painted finishes | 62% of designers favor wood, per NKBA |
| Neutral, earthy palettes | Off-white, tan, sage, and olive tones | 96% of designers rank neutrals as the |
Massachusetts Building Code Basics: What Every Homeowner Should Know (2026 Guide)

The Massachusetts building code basics every homeowner should understand start with a single reference number: 780 CMR. This is the statewide building code that governs nearly every construction, renovation and repair project in the Commonwealth, from a small interior wall removal to a full home addition. Unlike a patchwork of purely local rules, 780 CMR applies uniformly across all 351 Massachusetts municipalities, though local building departments still handle day-to-day permitting, fees and enforcement in their own specific way.
This guide breaks down what 780 CMR actually covers, how the current tenth edition differs from earlier versions, what the code’s energy requirements mean for homeowners, and what to expect when your next renovation project requires a permit.
What Is 780 CMR, and Who Enforces It?
780 CMR is the official designation for the Massachusetts State Building Code within the Code of Massachusetts Regulations. It is adopted and administered by the Board of Building Regulations and Standards, a fifteen-member board operating under the state’s Division of Occupational Licensure. The code sets minimum standards for the design, construction, alteration, repair, demolition and occupancy of buildings throughout the state, covering everything from structural integrity and fire safety to accessibility, means of egress and energy efficiency.
While the code itself is written and adopted at the state level, enforcement happens locally. Each city and town’s building department reviews permit applications, conducts inspections and interprets how the code applies to specific projects within its jurisdiction, which is why two homeowners doing similar renovations in different towns can still encounter somewhat different fee schedules and administrative processes even though the underlying structural requirements remain identical statewide.
What Typically Requires a Permit Versus What Does Not
Not every home improvement project requires a building permit under 780 CMR, and understanding this distinction helps homeowners plan accordingly. Structural changes, including removing or altering a load-bearing wall, adding a room, finishing a basement in a way that changes egress or occupancy, and any project involving new electrical circuits, plumbing lines or gas connections, virtually always require a permit and inspection. Additions, decks above a certain size or height, and any exterior work affecting the building envelope, such as replacing siding, roofing or windows, similarly fall under permit requirements in nearly every Massachusetts municipality.
Purely cosmetic work, such as painting, replacing flooring without altering the subfloor structure, or swapping fixtures without relocating plumbing or electrical connections, generally falls outside permit requirements, though local interpretation can vary somewhat between municipalities. When genuinely uncertain whether a specific project requires a permit, contacting your local building department directly, or asking a licensed contractor familiar with your town’s specific practices, avoids the risk of proceeding with unpermitted work that later creates complications, whether through fines, a stop-work order, or a disclosure issue at resale.
Quick Overview: The Two Volumes of the Code
| Volume | What It Covers | Based On |
| Residential Volume | One- and two-family dwellings and townhouses three stories or less, plus accessory structures | 2021 International Residential Code (IRC), with Massachusetts amendments |
| Base Volume | Commercial, industrial, |
Best Home Renovations for Resale Value: Smart Upgrades That Pay Off

While many renovations make a home more enjoyable to live in, not all of them significantly increase its market value. The key is choosing upgrades that appeal to a wide range of buyers while improving the home’s functionality, condition, and appearance.
For Massachusetts homeowners, renovations that improve energy efficiency, curb appeal, and overall maintenance often stand out in a competitive housing market. Buyers are typically willing to pay more for homes that feel move-in ready and require fewer immediate repairs.
In this guide, we’ll explore the Best Home Renovations for Resale Value that generally offer the strongest resale potential, discuss when it’s worth renovating before selling, and share practical tips for making renovation decisions that maximize your investment.
What Makes a Home Renovation Worth the Investment?
A valuable renovation isn’t designed just to please the eye, but to fill in the desires of buyers.
One of the largest factors is that it is functional. Kitchen refreshes or extra living space can be more appealing than projects with a more specific function.
Condition of the home is also a factor. When purchasing a home, buyers are going to be watching for any signs of deferred maintenance, such as an old roof, damaged siding, an old bathroom or any water damage that can be seen. Solving these issues can help elevate potential buyers’ confidence during showings and inspections.
The neighborhood and location should also be taken into consideration when making your choice. It is a better idea to invest in improvements that are similar to those of homes in your neighborhood than to try to build upgrades that are much higher than the local market.
Last, but not least, the quality of the workmanship is important. Despite careful planning, a renovation can be detrimental to a home’s value when the work is done with inferior materials or workmanship. Professional workmanship and durable finishes will help make your home look better and will help give a buyer the confidence that the home has been well taken care of.
The overall rule of the best renovations is that they balance cost, usability, and a large number of buyers.
Should You Renovate Before Selling Your Home?
It depends on the condition of your home, budget and your speed of selling.
When deciding on upgrades to make your home more marketable, it is best to invest in work that will benefit your home in the years to come, but not in projects that take a long time to recover your investment. It may be that only age-appropriate finishes, curb appeal and easily identified maintenance issues make a bigger difference than a total luxury makeover.
Any repair work should be done first if you have major structural or maintenance issues in your home, however, if the problems are cosmetic issues, cosmetic improvements should be done. A leaky roof, foundation problems and out-of-date electrical systems are the things that buyers and their home inspectors will be worried about more than a bit of paint on the cabinets or …
Basement Waterproofing Massachusetts: The Complete 2026 Homeowner’s Guide

Basement waterproofing Massachusetts homeowners rely on addressing both the symptoms and the underlying causes of moisture intrusion, rather than masking a wet wall with paint. Depending on your home’s condition, the right solution may involve improving drainage, repairing foundation cracks, installing an interior drainage system, or waterproofing the exterior foundation walls directly. Often, a combination of these approaches offers the most complete, long-lasting protection.
This guide covers why basement waterproofing matters so much for Massachusetts homes, what actually causes basement leaks, the waterproofing methods available today, realistic 2026 cost expectations, and how to choose the right contractor to protect your property for decades to come.
Why Basement Waterproofing Is Crucial in Massachusetts
Massachusetts Water and Groundwater
Precipitation is common year-round in Massachusetts, with significant snow accumulation each winter. When that snow melts each spring, the ground around your foundation can become fully saturated, creating hydrostatic pressure, the force groundwater exerts against basement walls and floors. Over time, this pressure pushes water through small cracks, joints or porous concrete, leading to leaks or persistent dampness. Freeze-thaw cycles make it worse, since water that freezes and expands inside cracks widens them for the next round of moisture.
Protecting Your Home’s Foundation
Water is one of the most significant structural hazards a home faces. Unresolved drainage issues allow saturated soil to cause cracking, shifting or gradual foundation deterioration. Professional waterproofing controls water flow around the foundation, reducing how much reaches the home and helping preserve long-term structural stability.
Preventing Mold and Poor Indoor Air Quality
Basement humidity is consistently higher than the rest of the home, and excess moisture creates ideal conditions for mold. The EPA identifies moisture control as the single most effective step in preventing household mold, and mold can begin developing within one to two days of a water event. Beyond damaging walls and belongings, mold releases spores that degrade indoor air quality well beyond the basement. Waterproofing reduces the humidity mold needs to establish itself.
Protecting Finished Living Spaces
Most Massachusetts homeowners use basements as genuine living space, whether as a family room, office or gym. Drywall, flooring, insulation, furniture and electrical systems in these spaces are all vulnerable to modest water intrusion, and repairing that damage typically costs far more than preventing it through proper waterproofing.
Preserving Your Home’s Value
A dry basement is a genuine selling point. Visible water damage, mold or foundation concerns make buyers hesitant and complicate inspections, so addressing moisture issues early protects both your investment and your home’s long-term marketability.
What Causes Basement Water Problems?
Basement leaks typically have more than one contributing cause, so identifying the source is the essential first step toward choosing the right fix.
- Heavy rainfall: Extended or heavy rain saturates surrounding soil, and water finds the easiest path, often through foundation cracks or joints.
- Snowmelt and freeze-thaw cycles: Melting snow pools around the foundation each spring, while repeated freezing and thawing widen existing cracks.
- Hydrostatic pressure: Accumulated groundwater presses against basement walls and floors, and given enough
Contractor Red Flags to Avoid Before Hiring: Protect Your Home and Your Investment

One of the most important options that you will have to make for your home is hiring a contractor. Your project could be a roof replacement, home addition, siding installation, or a complete renovation. The right contractor can ensure that your project is completed on schedule, on budget, and to professional standards. However, the wrong one can cause unfinished work, unexpected costs, shoddy work or even legal issues.
Most contractors are honorable professionals, but it’s important to pick up on some of those red flags before you sign a contract. Some preparation can save you thousands of dollars and months of frustration.
In this guide, we’ll go through the most prominent contractor red flags to steer clear of, their significance, and provide some helpful strategies to help you select a contractor you can trust.
Why Recognizing Contractor Red Flags Matters
Spotting contractor warning signs early can assist you in making informed decisions and avoiding costly surprises.
Financial Risks
The contractor who gives an unusually low bid might end up raising the bid when it comes to change orders, using cheaper materials or walking away from the job once the deposit is paid. If the work somehow gets done, it can be more expensive to fix up bad workmanship than to get a good contractor the first time around.
When considering acceptance of any proposal, be sure to know what is and isn’t covered in the estimate.
Safety Concerns
Building projects are generally related to structural works, electrical systems, roofing, plumbing, and various other highly specialized work that could cause severe safety problems when done inaccurately.
When not installed properly, some of the problems that can occur are:
- Water leaks and water damage to the roof surface and structure.
- Structural instability
- Electrical hazards
- Plumbing failures
- Inadequate waterproofing allows moisture to accumulate and start growing mold.
A professional contractor can help make sure that the job is done in a way that is in line with industry standards and will keep your family safe.
Building Code Violations
Local building codes are designed to safeguard homeowners and to ensure that buildings are built in a safe fashion. An inexperienced or dishonest contractor can overlook or fail to obtain the necessary permits or comply with the inspections to make a quick buck or save time. The shortcuts can cause big trouble later on, however, particularly if you choose to put your house up for sale or file an insurance claim.
Failure to adhere to code can result in costly changes that have to be made prior to an inspection.
Warranty Problems
Quality contractors usually warrant their workmanship and manufacturer’s warranties.
If a contractor won’t talk about coverage, or if he just makes hand-wavy promises verbally, you may have to pay for repairs when the job is completed if something goes wrong.
Request written warranties prior to work.
Stress and Project Delays.Stress and Project Delays.
Unreliable contractors often:
Miss scheduled appointments
Don’t keep them informed
Leave projects unfinished
Toss out the completion dates regularly. Replace …
How to Prepare for a Bathroom Remodel: 7 Essential Steps
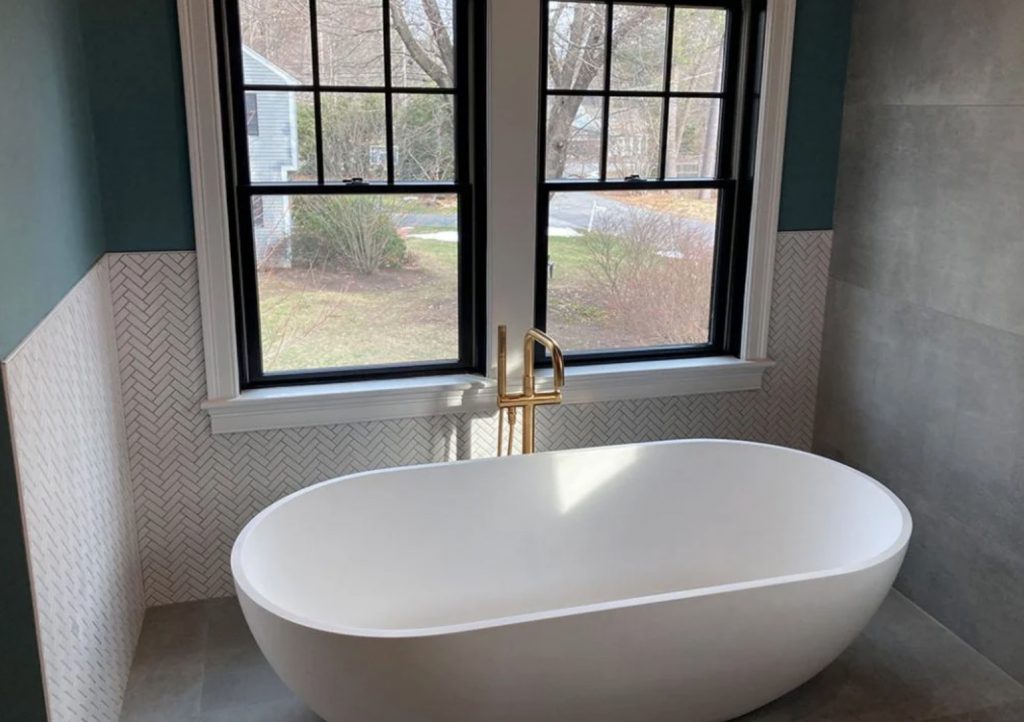
Remodeling your bathroom can be a necessity when dealing with functional problems that need a timely solution. Things can get even more complicated if you only have one or two bathrooms in a home shared by four or five family members, since losing access to even one bathroom for an extended period creates real daily disruption. Knowing how to prepare for a bathroom remodel properly before construction begins can significantly speed up the overall timeframe involved and make the entire experience far more manageable for your household.
This guide walks through seven essential steps for preparing for a bathroom remodel, covering everything from establishing a clear timeline to arranging alternative bathroom access during the renovation period.
Why Preparation Is Just as Important as the Remodel Itself
Many homeowners invest significant time and energy into choosing tiles, fixtures, and finishes for their bathroom remodel, while giving far less attention to how the household will actually function during the weeks or months the project is underway. This imbalance often leads to unnecessary stress, avoidable delays, and daily frustration that could have been largely prevented with better upfront preparation.
Understanding how to prepare for a bathroom remodel thoroughly before work begins helps protect both your renovation timeline and your household’s daily routine, making the difference between a project that feels manageable and one that feels genuinely overwhelming from start to finish.
1: Establish a Clear Timeframe and Free Up Your Schedule
One of the best ways to ensure things go smoothly is making yourself genuinely available to sign off on decisions and respond quickly when unexpected questions or issues arise during the project. Once you’ve set up a timeline with your contractor, the best way to encourage them to stick to the schedule is by taking the initiative to do the same on your end.
Why Your Availability Matters More Than You Might Expect
Renovation projects often stall when contractors need a homeowner’s input or approval and can’t reach them in a timely way. If material decisions need to be made on the fly, approvals need to be given before the next phase can begin, or unexpected discoveries require immediate discussion, a homeowner who’s difficult to reach can add days or even weeks to a project timeline that should have moved forward smoothly.
Setting Realistic Expectations for the Timeline
Work with your contractor to establish a realistic start and end date for each phase of the project, accounting for permit approval timelines, material lead times, and potential buffer time for unexpected findings. A bathroom remodel in an older home can sometimes reveal hidden issues like water damage, outdated plumbing, or mold behind walls, all of which require immediate attention before finishing work can proceed. Bathroom remodels, particularly in older Massachusetts homes, frequently uncover hidden issues once walls are opened and flooring is removed.
Communicating Your Availability to Your Contractor
At the beginning of the project, let your contractor know the best way to reach you during the day, whether by phone, text, or …
Signs of a Quality Paint Job: 7 Proven Things to Check

If it’s your first time hiring a professional for a paint job, you might not know exactly what to look for when attempting to judge the quality of the work being done. In most cases, you’ll want to know whether you’re genuinely getting your money’s worth, especially when investing a significant sum in professional painting services. Understanding the signs of a quality paint job before the project wraps up gives you the confidence to evaluate the finished result accurately and raise any legitimate concerns before the contractor leaves the site.
This guide walks through seven proven things to check when assessing whether a professional paint job has been completed to a genuinely high standard.
Why Knowing These Signs Matters
A fresh coat of paint can make a dramatic difference in how a room looks and feels, but not all paint jobs are created equal. The difference between a quality result and a mediocre one isn’t always immediately obvious, particularly to homeowners who haven’t hired a professional painter before. Learning what to look for empowers you to hold your contractor accountable and ensures you’re not accepting work that falls short of what you paid for.
Many of the signs of a quality paint job are found in the details, the areas that require the most skill and patience to execute properly. A painter who gets these details right consistently is one worth recommending and rehiring for future projects.
1: Clean, Straight Lines at Joints and Edges
The joints and edges of a room are some of the more technically challenging areas to address during a paint job. If the work of your painting contractor exhibits clean, straight lines in these sections, it’s a strong indication that they know what they’re doing and have taken the time to prepare and execute the work properly.
Where to Look for Edge Quality
One of the most common areas to evaluate is where the ceiling meets the walls, particularly when two different colors are involved. A clean, precise line where these two surfaces meet, without bleeding of one color into the other, requires steady hands, proper masking, and the kind of patience that distinguishes a skilled professional from a rushed or inexperienced painter.
Checking Other Edge Areas
Beyond the ceiling-to-wall junction, check the edges where walls meet door frames, window trim, baseboards, and crown molding. Each of these transitions requires careful cutting-in work that reveals the painter’s level of skill and attention to detail. Uneven, wavy, or bleeding lines in these areas are a clear sign the work wasn’t executed to a professional standard.
2: Even Shading and Consistent Color Throughout
If one part of your wall happens to be a noticeably darker or lighter shade than the rest, you haven’t hired a skilled professional. Any section of a room should exhibit complete consistency, not only with the shades involved but with texture as well. Uneven color across a wall surface typically indicates inadequate surface preparation, insufficient coats of paint, or poor technique during application.…
How to Prepare for an Interior Paint Job: 7 Easy Steps

The first issue that needs to be addressed when planning a residential paint job is identifying the area concerned. In general, painting projects fall into two primary categories: interior and exterior. Each involves varying requirements due to the differences in the environment and surfaces involved. If you’re planning an interior paint job, knowing how to prepare properly before the first drop of paint is applied makes a significant difference in the quality of the finished result and the smoothness of the overall process.
This guide walks through seven easy steps to prepare your home for an interior paint job, covering everything from clearing the space to protecting floors and ensuring your painter has everything they need to deliver a genuinely professional finish.
Why Preparation Makes Such a Difference in the Finished Result
Many homeowners underestimate how much the preparation phase contributes to the quality of a finished paint job. A painter working in a well-prepared space can focus entirely on applying paint with proper technique, without navigating around obstacles, How to Prepare for an Interior Paint Job improperly protected furniture, or dealing with a cluttered environment that makes clean, precise work difficult.
Conversely, a paint job done in a poorly prepared space often shows the consequences in the finished result, whether that’s paint drips on furniture, uneven coverage caused by working around obstructions, or damage to items that weren’t properly protected before work began. Taking the time to prepare thoroughly is one of the most effective ways to ensure you get your money’s worth from a professional interior painting service.
1: Move Electronics and Appliances Out of the Room
The first step is moving any portable electronics and appliances out of the rooms being painted. This is essential not only to prevent accidents that might lead to damaged items but also to declutter the space, giving your painter unobstructed access to every wall surface they’ll be working on.
What Counts as Portable Electronics and Appliances
This category includes televisions, computers, stereo equipment, lamps, small kitchen appliances, fans, and any other electrically powered items that can reasonably be moved without requiring professional assistance. Even items that seem far from the walls being painted should be removed if there’s any chance they could be affected by dust, fumes, or accidental paint contact during the project.
Don’t Forget Wall Hangings and Ornaments
Wall hangings, framed artwork, mirrors, shelving, decorative hooks, and any other ornaments should also be removed from the room before work begins. These items not only need protection from paint but also need to be out of the way so your painter can work freely along every section of wall without interruption.
2: Cover Heavy Furniture With Protective Tarps
Heavier items such as sofas, large bookshelves, and bed frames may be impractical to remove from a room entirely due to their bulk. In these cases, ensuring no stray drops of paint reach these items is the next critical step in the preparation process.
How to Protect Large Furniture Items
Moving everything …
Stages of Painting a House: 7 Proven Steps to Follow
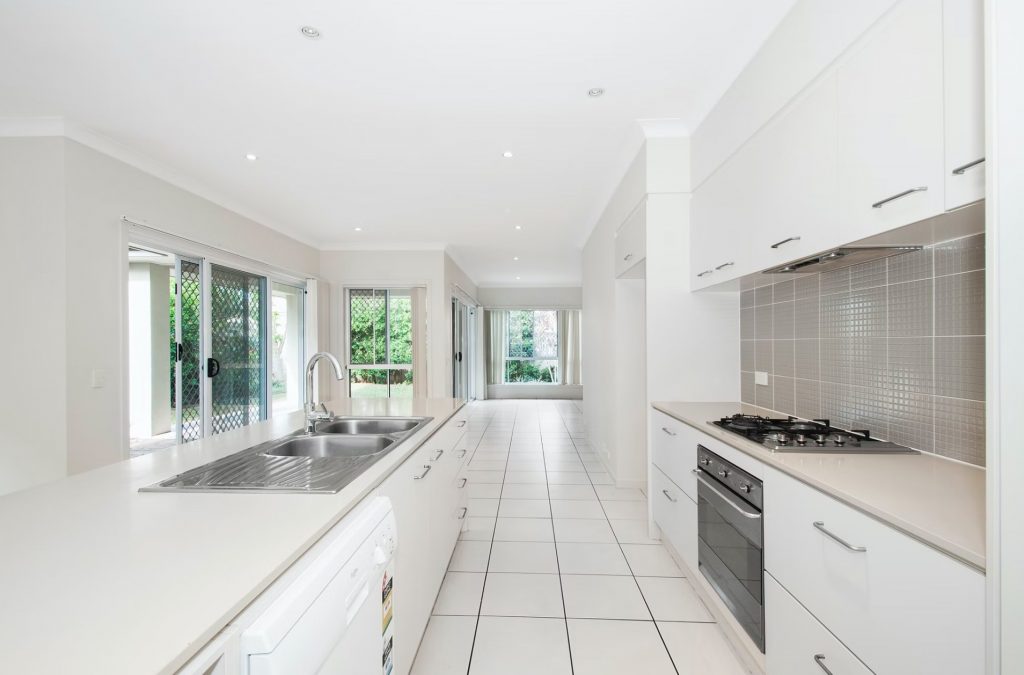
There are a lot of things involved with painting a house, especially when the area concerned represents a significant surface area. Whether you’re thinking about hiring a professional painter or planning on doing the job yourself, understanding the stages of painting a house before you begin helps you approach the project with realistic expectations and a clear sense of what comes next at every point in the process.
This guide walks through seven proven steps involved in painting a house, from initial repair and preparation all the way through to the final coat of paint, helping you achieve a genuinely professional finish regardless of the scope of your project.
Why Understanding the Stages of Painting a House Matters
Jumping into a house painting project without understanding the full process often leads to skipped steps, poor preparation, and a finished result that doesn’t hold up as well or look as professional as it should. Each stage of the painting process builds on the one before it, which means cutting corners early almost always shows up in the quality of the final product.
Taking the time to understand what’s involved at each stage, whether you’re managing the project yourself or overseeing a professional painter, helps ensure nothing important gets overlooked and that the finished result meets the standard you’re expecting.
1: Assess the Condition of the Surface
Before any preparation work begins, a thorough assessment of the surfaces to be painted is essential. This means walking around the entire area to be painted and identifying existing damage, such as cracks, peeling paint, rot, mold, loose caulking, or areas where the previous paint has failed, that will need to be addressed before new paint can be applied.
Why a Thorough Assessment Saves Time and Money
Identifying all surface issues upfront allows you to address them systematically during the preparation phase, rather than discovering problems mid-project that require work to stop while additional materials are sourced. A comprehensive assessment also helps your painter provide a more accurate estimate of the time and materials involved, reducing the likelihood of unexpected cost increases once work has begun.
2: Repair and Prepare the Surface
The first thing any professional painter will tell you when dealing with a major painting project is that your house has to be adequately prepared before a fresh coat of paint can be applied. This involves removing any accumulated dirt and grime through a thorough pressure wash, as well as sanding down any areas that are suffering from excessive peeling or flaking paint.
Addressing Cracks, Caulking, and Related Damage
You’ll also need to address any cracks, loose or deteriorated caulking, and related surface damage around the house before painting begins. Caulking around windows, door frames, and trim should be inspected carefully, since gaps in these areas not only affect the appearance of the finished paint job but can also allow moisture to penetrate and cause structural damage over time.
Why Preparation Is the Most Important Stage
Experienced painters consistently emphasize that preparation is …
Benefits of Hiring a Professional House Painter: 7 Proven Reasons
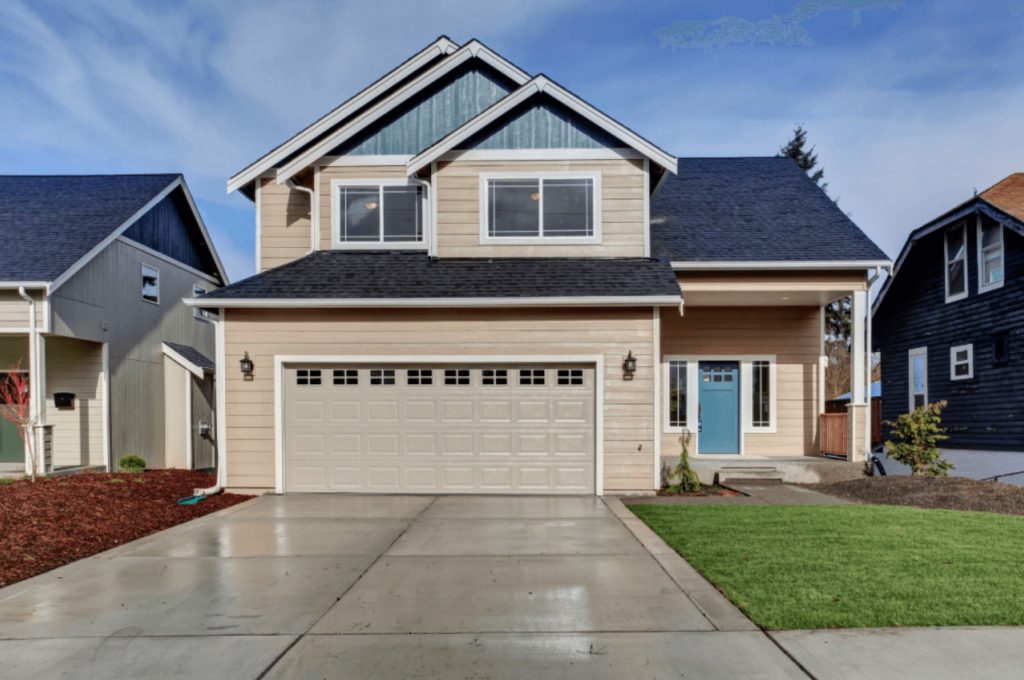
One of the major decisions involved with painting your residence is whether to hire a professional or approach the task as a DIY project. Although painting may seem like a relatively straightforward job on the surface, there are multiple important factors to consider when tackling it at a professional level. Understanding the benefits of hiring a professional house painter helps you make an informed decision about whether bringing in expert help is the right choice for your specific project.
This guide walks through seven proven benefits of hiring a professional house painter, from faster project completion and superior quality to expert guidance on colors, finishes, and stylistic choices.
Why the DIY vs. Professional Decision Matters More Than You Might Think
Many homeowners initially lean toward a DIY approach to house painting, drawn by the perceived cost savings and the sense of personal satisfaction that comes from completing a home improvement project independently. While this approach can work well for very small, simple tasks, the reality of painting an entire house, or even a significant portion of one, is considerably more complex than it appears.
The benefits of hiring a professional house painter extend well beyond simply having someone else do the physical work. They encompass quality of results, time efficiency, access to expertise, and protection from costly mistakes that can occur when the job isn’t executed with the right tools, techniques, and materials.
1: Faster Project Completion
If you’d like to give your entire house a fresh coat of paint or want the task completed sooner rather than later, hiring an established painting contractor ensures the job is finished as quickly as possible without sacrificing quality. Handling the job yourself requires working around your existing schedule, and even if you manage to free up significant time, it’s unlikely you’ll match the speed of an experienced professional team.
Why Professionals Work Faster Without Cutting Corners
Professional painters work faster not because they rush, but because they’ve completed the same tasks hundreds of times before. Their efficiency comes from familiarity with the process, proper tools, and an established workflow that minimizes wasted time between steps. What might take a homeowner an entire weekend to complete on a single room can often be finished by a professional team in a fraction of the time.
The Real Cost of a Prolonged DIY Project
A DIY painting project that drags on over multiple weekends creates extended disruption to your household routine and keeps rooms out of normal use for far longer than necessary. For homeowners in Newton MA looking to minimize disruption, particularly during a broader renovation, professional painters offer a significantly faster path from start to finish.
2: Superior Quality Results
The experience that comes with a professional painter is not something that can be easily replicated through a DIY effort, regardless of how much preparation or research goes into the attempt. If you’re painting your house with the aim of enhancing its resale value or simply achieving a finish that looks genuinely impressive, …