
Common Mistakes to Avoid When Building a Deck
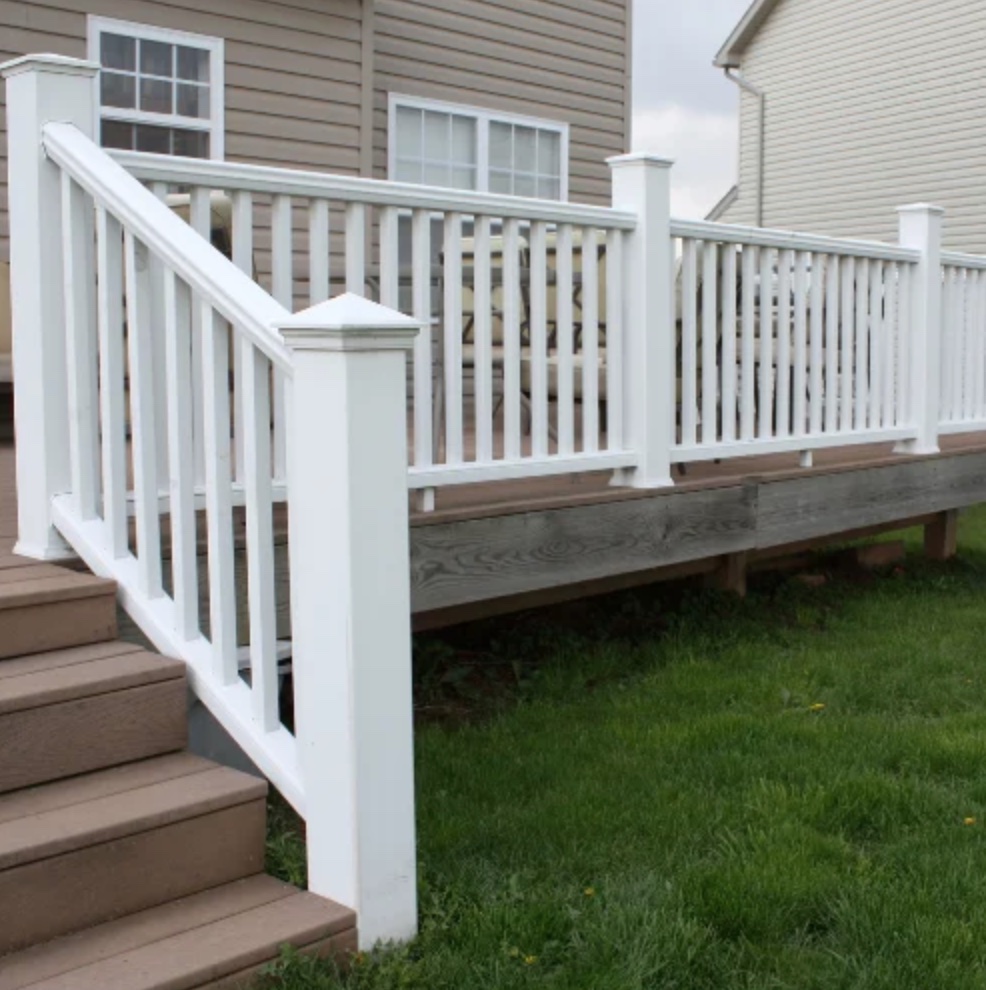
A deck can be a great place to rest and relax after a long day at work or finishing an exhausting list of chores. If you’re thinking about adding a deck to your home, however, there are a few common mistakes that you should look out for before and during construction. Understanding the common mistakes to avoid when building a deck ahead of time can save you from costly rework, safety hazards, and a finished structure that doesn’t hold up the way it should.
This guide walks through seven mistakes homeowners frequently make when building a deck, along with practical guidance on how to avoid each one and ensure your finished deck is both safe and built to last.
Why These Mistakes Happen So Often
Building a deck might seem like a relatively straightforward home improvement project compared to a full home addition, which is exactly why so many of these mistakes happen in the first place. Homeowners and even some less experienced contractors sometimes underestimate the structural, safety, and long-term maintenance considerations involved, leading to shortcuts that seem reasonable at the time but create problems down the road.
Understanding where these mistakes typically occur, and why they matter, helps you approach your own deck project with the right level of attention, whether you’re managing the build yourself or working closely with a professional contractor.
1: Improper Attachment of Beams and Support Posts
If you’re implementing a DIY project instead of hiring Deck Building professionals, a common misconception you should be aware of involves how the deck beam is attached to the support posts. Recent studies have found that notching the posts and allowing the beam to rest directly on top of the post, rather than being attached to the side of it, can significantly reduce the potential for structural collapse.
Why Side Attachment Is a Serious Structural Risk
When a beam is attached to the side of a post using only bolts or lag screws, the connection relies entirely on the strength of the fasteners to support the full weight of the deck above. Over time, wood can shrink, fasteners can loosen, and the connection can weaken significantly, particularly under heavy loads like large gatherings or accumulated snow during Massachusetts winters.
How Notched Post Connections Improve Safety
By notching the top of the support post and allowing the beam to rest directly on this notch, the weight of the deck is transferred through solid wood-to-wood contact rather than relying solely on fasteners. This approach distributes the load far more effectively and significantly reduces the risk of a catastrophic failure, even if individual fasteners weaken over time.
Why This Mistake Is So Common in DIY Builds
Many DIY builders aren’t aware of this structural distinction, since side-mounted beam connections are visually simpler to execute and don’t require the additional step of notching each post. Unfortunately, this shortcut is one of the more dangerous mistakes on this list, since beam and post connections are foundational to the entire structure’s integrity.
2:
…Why You Should Hire a Contractor to Build Your Deck: 7 Reasons

Building a deck is a great way to enhance the picturesque value of your home. It might seem like a relatively minor inconvenience, appearing to be a straightforward project that could be completed in a matter of days, but the reality of a proper deck build involves far more planning, structural knowledge, and technical skill than most homeowners initially expect. If you’re thinking about adding this extension to your residence, hiring a contractor ensures you can turn your vision into reality while achieving a genuinely satisfactory, safe, and long-lasting result.
This guide walks through seven compelling reasons why you should hire a contractor to build your deck, covering everything from craftsmanship and speed to design flexibility and long-term value.
Why This Decision Deserves Careful Consideration
A deck is more than a simple platform attached to your home. It’s a structural addition that needs to support significant weight, withstand years of exposure to Massachusetts weather, and meet specific building codes designed to keep everyone who uses it safe. While DIY home improvement projects can be rewarding for smaller tasks, a deck build involves enough structural complexity, safety considerations, and design nuance that the value of professional expertise becomes clear once you understand everything involved.
Weighing the reasons below against the appeal of a DIY approach helps you make an informed decision about which path is right for your specific project and comfort level with construction work.
1: Enhanced Quality and Craftsmanship
It’s highly unlikely that you’ll be able to do a better job than a professional with years of dedicated experience building decks specifically. If you’re seeking a genuinely polished, well-executed addition to your home, hiring an established contractor is your best chance of achieving that level of quality.
What Professional Craftsmanship Actually Looks Like
The difference between professional and amateur deck work often shows up in the details that aren’t immediately obvious but become apparent over time. Evenly spaced decking boards, precisely cut angles at corners, properly countersunk fasteners, and a level, consistent surface throughout are all hallmarks of experienced craftsmanship. These details aren’t just cosmetic. They also contribute to the deck’s long-term durability and structural performance.
Experience With Structural Best Practices
Professional deck builders bring knowledge accumulated across dozens or even hundreds of previous projects, including structural best practices that aren’t always obvious to a first-time builder. This includes proper beam-to-post connections, adequate footing depth for the local frost line, and correct fastener selection for specific decking materials, all of which directly affect the safety and longevity of the finished structure.
Avoiding Costly Mistakes
Amateur builders often don’t recognize structural mistakes until they’ve already caused problems, sometimes years after the deck was completed. A professional contractor’s experience allows them to identify and avoid these mistakes from the outset, saving you from the far more expensive process of diagnosing and repairing structural issues after the fact.
2: A Significantly Speedier Process
Professionals will likely be able to finish the job in a considerably shorter time frame compared to an amateur …
How to Build a Wood Pallet Deck: A Simple DIY Guide
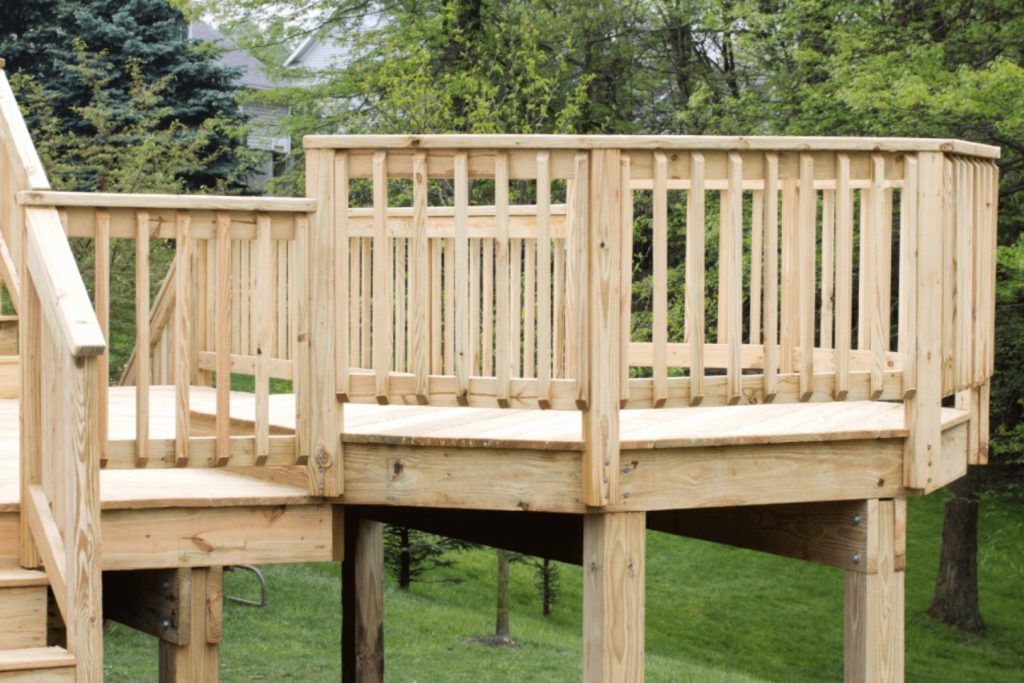
Adding a deck to your house is a great way to raise the resale value of your residence without having to make a significant financial investment. It’s also one of the few outdoor additions you can realistically take on yourself, particularly if all you’re after is a simple, low-cost design rather than an elaborate multi-level structure. A wood pallet deck is one of the most accessible DIY projects available to homeowners, using repurposed materials to build a functional outdoor platform at a fraction of the cost of professionally installed decking.
This guide walks through exactly how to build a simple wood pallet deck, from sourcing the right pallets and preparing your site to assembling and sealing the finished structure, along with the safety and durability considerations that most quick tutorials skip over.
Is a Pallet Deck Actually a Good Idea?
Before getting into the build process, it’s worth being upfront about what a pallet deck is, and isn’t, well suited for. This project makes the most sense for a low, ground-level platform used for casual seating, a small patio table, or a garden nook, rather than an elevated structure meant to bear significant ongoing weight or replace a permitted, code-compliant deck attached to your home.
Pallet decks sit close to grade, aren’t engineered the way a traditional joist-and-beam deck is, and generally aren’t built to satisfy local building codes the way a permitted deck would be. If your goal is an elevated deck attached to your house, particularly anything requiring railings under Massachusetts code, that project calls for proper footings, structural framing, and likely a licensed contractor rather than repurposed pallets. But for a simple, ground-level DIY platform, pallets remain a genuinely practical and affordable option.
1: Source the Right Pallets
Purchase 10 to 20 wood pallets of traditional size, usually considered to be 48 inches by 40 inches. The number you need depends on the height you’re going for. If you want a bit of elevation between you and the ground, you’ll need enough pallets to stack one layer on top of another.
Where to Find Pallets Safely
Pallets can often be sourced for free or at low cost from local hardware stores, garden centers, and shipping or distribution warehouses that regularly need to dispose of them. Reaching out directly and asking whether they have pallets to give away is frequently more effective than searching classified listings, since many businesses are happy to have someone haul them off rather than pay for disposal.
Why the “HT” Stamp Matters More Than Anything Else
Not all pallets are safe to use for a project you’ll be sitting, walking, or placing furniture on. Every legitimate pallet is stamped somewhere on its frame with an IPPC logo and a code that tells you how it was treated. Look specifically for the letters HT, which stands for heat-treated. Heat-treated pallets are safe for outdoor DIY use since the wood was kiln-dried rather than chemically treated.
Avoid any pallet stamped MB, which indicates …
What to Consider When Adding a Deck to Your Home: 7 Tips

A deck can be an excellent addition to your home if you have the space for it. There are numerous reasons to add this extension, since a deck offers multiple opportunities for entertainment, rest, and relaxation that extend your living space well beyond the walls of your house. Before diving into design decisions, though, understanding what to consider when adding a deck to your home helps you avoid regulatory surprises, unexpected costs, and construction delays that catch many first-time deck owners off guard.
This guide walks through seven important factors to think through before hiring Deck Building professionals, covering everything from permits and property taxes to sizing restrictions and long-term planning.
Why These Considerations Matter Before You Start Designing
It’s tempting to jump straight into choosing materials, colors, and layout when planning a new deck, since these are the fun, visible decisions that shape how the finished space will look and feel. But several less obvious factors, including legal requirements, tax implications, and property boundaries, can significantly affect what you’re actually allowed to build, and skipping this groundwork can lead to costly redesigns or even forced removal of a completed structure.
Addressing these practical considerations early in the planning process protects your investment and ensures the deck you eventually build is one you’re legally and financially prepared to own.
1: Understand Permits and Regulations
The first issue to consider is whether you need a permit or license to add this extension to your home. The rules vary significantly by location, so checking your local regulations is a genuinely important first step before finalizing any design plans. In some areas, for instance, a permit isn’t required as long as the deck sits no more than 30 inches off the ground, though this threshold and the surrounding requirements differ from one municipality to the next.
Why Permit Requirements Exist
Building permits for decks typically exist to ensure the finished structure meets minimum safety standards for footing depth, structural load capacity, and railing requirements where applicable. The permitting process usually includes inspections at key stages of construction, verifying that footings are properly sized and set below the local frost line, and that any required railings meet height and spacing standards designed to prevent falls.
Consequences of Skipping the Permit Process
Building without a required permit can create serious complications down the road, well beyond the immediate risk of fines. Unpermitted structures are frequently identified during home inspections when a property is later put up for sale, which can delay closing, reduce your home’s appraised value, or in some cases require the deck to be retroactively permitted or even partially rebuilt to bring it into compliance. Given how disruptive and expensive these outcomes can be, confirming permit requirements before construction begins is always the safer path.
How to Confirm Requirements for Your Specific Property
Contact your local building department directly, or work with an experienced local contractor who’s already familiar with the specific permitting process in your area. Requirements can vary not just by
Things You Should Know About a Kitchen Remodel Before You Start
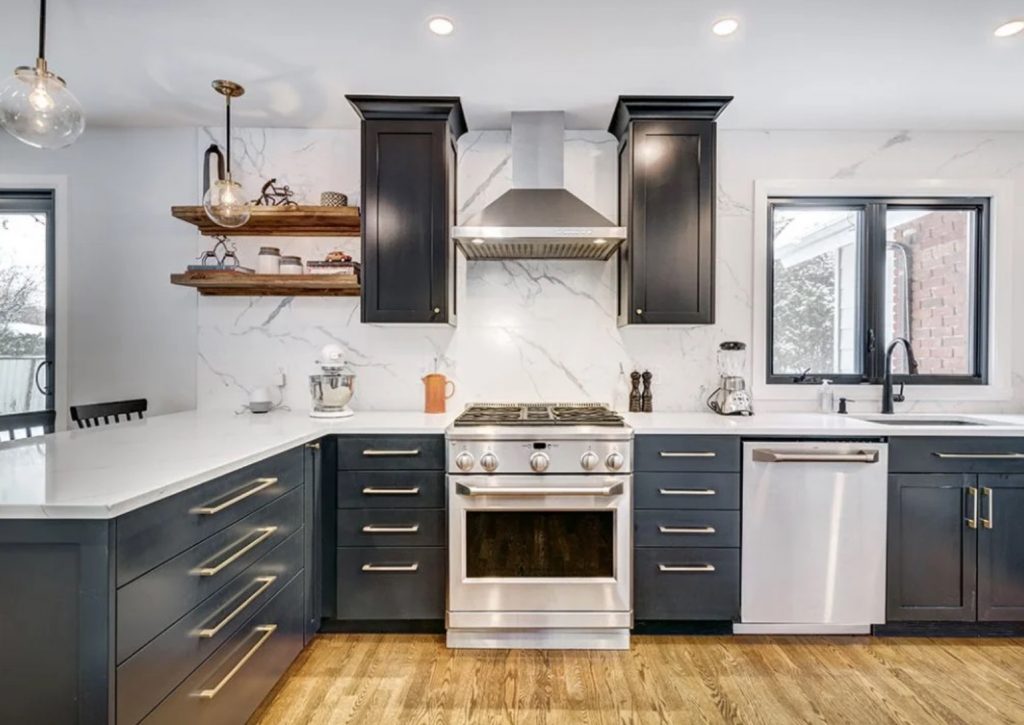
If you’re thinking about renovating your kitchen, it’s wise not to rush into the project but rather take your time to do some adequate research first. There are a number of elements that many homeowners don’t consider when contemplating a kitchen renovation, and overlooking them can lead to a finished result that looks beautiful in photos but doesn’t actually solve the problems that motivated the project in the first place. Understanding these things you should know about a kitchen remodel before you get started helps you plan a project that delivers genuine, lasting value rather than just a fresh coat of visual polish.
This guide walks through seven essential facts every homeowner should understand before committing to a kitchen remodel, covering everything from priority-setting and contractor vetting to budgeting and realistic timelines.
Why Going In Informed Makes Such a Difference
A kitchen remodel touches nearly every part of daily life, from how meals get prepared to how your household gathers and entertains. Because the financial and practical stakes are high, and because mistakes made during a renovation are expensive and disruptive to correct afterward, going into the process informed protects both your budget and your long-term satisfaction with the finished space.
Many of the most common regrets homeowners have after a kitchen remodel trace back to decisions made, or skipped, before construction ever began. The facts below address the areas most likely to catch first-time renovators off guard.
1: Aesthetics Are the Last Thing to Consider
Many people are too focused on the beautification aspect of a remodel and tend to ignore the nitty-gritty details that can make or break a Kitchen Remodeling project. Replacing rusty pipes or enlarging your sink bowl to minimize backsplash mess is more important than picking the tiles that best match your flooring.
Why Functional Issues Should Come First
It’s easy to get swept up in choosing countertop colors, cabinet finishes, and statement lighting, since these are the elements that show up most clearly in before-and-after photos. But a beautifully finished kitchen built on top of unresolved plumbing, electrical, or structural issues tends to age poorly, both literally and in terms of how satisfied you feel living with it. Addressing functional problems first ensures your investment in aesthetics actually holds up over time, rather than masking issues that will resurface later.
Common Functional Issues Homeowners Overlook
Outdated wiring that can’t support modern appliance loads, inadequate ventilation over the stove, poor water pressure, and undersized electrical panels are all functional problems that don’t show up in a quick visual walkthrough but significantly affect how well your kitchen performs day to day. A thorough pre-renovation assessment, ideally with a contractor who evaluates these systems specifically, helps surface these issues before they’re buried under new finishes.
Building a Priority List Before You Start Choosing Colors
Before browsing tile samples or paint swatches, take the time to walk through your current kitchen and note every functional frustration you experience regularly, whether that’s inadequate counter space, an inefficient layout, or …
Finding the Best Contractor for your Kitchen Remodeling Needs
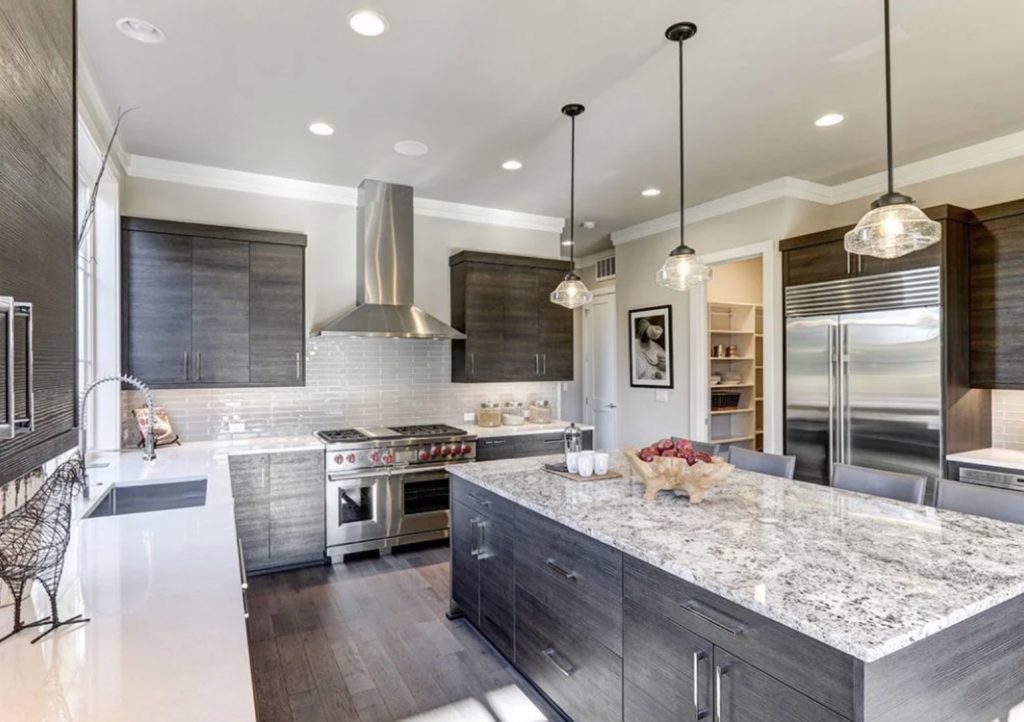
If you’re planning on overhauling your entire kitchen, finding the best contractor for kitchen remodeling potential success. Any shoddy work is something you’ll have to live with for an extended period, unless you can afford to pay twice for the same remodel. Finding the best contractor for your kitchen remodeling needs isn’t just about comparing prices. It’s about identifying a professional who delivers quality craftsmanship, communicates clearly, and stands behind their work for years to come.
This guide walks through seven proven tips to help you confidently find the right contractor for your next kitchen renovation, covering everything from gathering referrals to verifying licenses and permits.
Why Choosing the Right Contractor Matters So Much
A kitchen remodel represents one of the largest investments most homeowners make in their property, both financially and in terms of how the space functions in daily life. Unlike smaller home projects, mistakes made during a kitchen renovation are difficult and expensive to correct after the fact. A poorly installed countertop, an inefficient layout, or shoddy cabinetry work doesn’t just look unfortunate. It becomes a daily frustration you’ll live with until you can afford to fix it properly.
This is precisely why finding the best contractor for your kitchen remodeling needs deserves as much careful attention as choosing your materials and design. The right contractor brings not just technical skill, but also problem-solving expertise, honest communication, and the kind of craftsmanship that holds up well beyond the initial walkthrough.
1: Start With Word of Mouth
Word of mouth is arguably the best way to get an honest evaluation of a potential candidate’s previous work. If you know someone who’s had a kitchen remodel done before and was genuinely satisfied with the results, contacting the same contractor they used is one of your best opportunities to ensure quality work for your own project.
Why Personal Referrals Carry So Much Weight
Online reviews can be helpful, but they don’t always tell the full story of how a contractor communicates, handles unexpected issues, or manages a project’s timeline. A personal referral from someone you trust gives you a far more complete picture, since you can ask detailed follow-up questions about their experience that a star rating simply can’t answer.
Expanding Your Search Beyond Immediate Friends
If you don’t personally know anyone who’s recently completed a kitchen remodel, consider asking neighbors, coworkers, or local community groups for recommendations. Many homeowners are happy to share their experiences, both positive and negative, and this kind of grassroots research often surfaces contractors who do excellent work but don’t necessarily have a large online marketing presence.
2: Take Time to Conduct Interviews
Many homeowners make the mistake of rushing through the process of finding a suitable candidate. Conducting an adequate level of research also involves meeting candidates in person to gauge whether your personalities and communication styles align well. Working with someone you don’t particularly get along with can be a genuinely difficult experience throughout a project that may span several weeks or months, …
Saving Money on Kitchen Remodels Without Cutting Corners
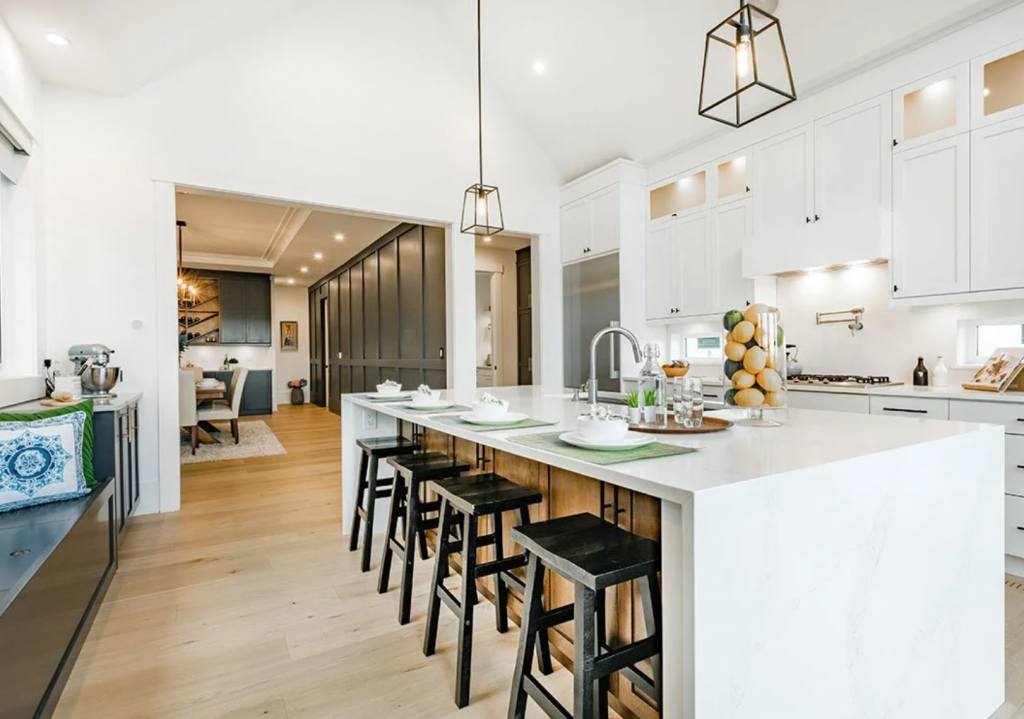
One of the major reasons many homeowners are hesitant about kitchen remodeling is the cost involved with such a project. Although a full overhaul will no doubt cost thousands of dollars, how you approach the process can help you save a significant amount without compromising on the quality or appearance of the finished result. You don’t have to opt for the cheapest materials available when looking to trim costs during a kitchen remodel. With the right strategies in place, you can achieve a genuinely impressive transformation while keeping your budget firmly under control.
This guide walks through seven proven tips for saving money on kitchen remodels, covering everything from refurbishing existing elements to making smart decisions about where to splurge and where to economize throughout the project.
Why Smart Budgeting Matters More Than Simply Spending Less
There’s an important distinction between saving money on a kitchen remodel and simply spending as little as possible. Choosing the cheapest available option for every element of the project often leads to a finished kitchen that looks underwhelming, requires premature repairs, or ends up costing more in the long run through frequent maintenance and early replacement.
Genuine cost savings in a kitchen remodel come from thoughtful prioritization, strategic decision-making, and understanding where your money will deliver the greatest long-term value. The tips below are all grounded in this principle, focusing on approaches that deliver real savings without compromising the quality of your finished kitchen.
Before buying materials, appliances, or hiring contractors, set a clear budget and list your must-haves versus nice-to-haves. Decide where you want to invest, for example, a premium countertop paired with more budget-friendly cabinetry, or a high-end sink alongside mid-tier hardware. When you have clear priorities, it becomes significantly easier to make choices that cut costs without sacrificing the elements that matter most to you.
1: Refurbish Existing Areas Instead of Replacing Everything
Contrary to popular belief, you don’t have to tear up everything and start from scratch when conducting a kitchen remodel. One of the most effective ways to save money is by refreshing existing elements like cabinets rather than replacing them entirely, which is almost always one of the largest cost items in any kitchen renovation.
Cabinet Refacing and Repainting
If your existing cabinet boxes are structurally solid, refacing or repainting them can deliver a dramatic visual transformation at a fraction of the cost of full replacement. The cheapest approach is a fresh coat of paint, which can completely change the look and feel of your kitchen for a relatively modest investment. You can also add new veneer to existing cabinet surfaces, or replace specific components like cabinet doors or hardware, both of which give the impression of entirely new cabinetry without the expense of replacing the underlying boxes.
Considering Countertops and Other Surfaces
The same principle applies to countertops and other surfaces. If your existing countertops are in decent structural condition but simply look outdated, a resurfacing treatment or even a thorough deep clean can make a meaningful …
Making a Walk-In Closet: 7 Proven Tips for 2026

To finally put your unused spare room to good use, transforming it into a walk-in closet is an excellent way to add a sense of elegance and tranquility to your home. Walk-in closets are far more than oversized cabinets when designed thoughtfully. A well-planned walk-in closet can become your personal retreat, a quiet space to gather your thoughts in the morning as you get ready for the day ahead.
This guide walks through seven proven tips for making a walk-in closet that’s both beautiful and genuinely functional, covering everything from initial planning to final design details.
Why Making a Walk-In Closet Is Worth the Investment
A spare room that sits unused represents wasted potential in any home. Making a walk-in closet out of that space transforms it into something you’ll interact with daily, adding both functional storage and a meaningful sense of calm to your morning and evening routines. Beyond the personal enjoyment it offers, a well-designed walk-in closet can also add real value to your home, since organized, generous closet space is consistently appealing to potential buyers.
The most ideal approach when looking to convert a room into a walk-in closet is reaching out to professional help. Established remodeling companies can help you develop a customized design that’s truly tailored to your preferences, rather than settling for a generic layout that doesn’t reflect how you actually get dressed and organize your belongings each day.
1: Start With Professional Guidance
Bringing in an experienced remodeling company early in the process gives you access to design expertise that goes well beyond simply installing shelves and rods. A professional can evaluate your spare room’s dimensions, existing windows and doors, and electrical setup to develop a layout that maximizes both storage and visual appeal.
Why Professional Input Matters for This Project
Walk-in closets involve more design nuance than most homeowners initially expect, including weight distribution for shelving, proper spacing for different garment types, and lighting placement that avoids casting shadows on stored clothing. An experienced contractor can help you avoid common layout mistakes that aren’t obvious until the space is already built and proves frustrating to use.
2: Think Carefully About Spacing and Layout
Developing the spare room to create a comfortable atmosphere means you need to consider aspects like shelf placement and clothing rack positioning carefully before any construction begins. A walk-in closet that’s been planned thoughtfully feels spacious and organized, while one that’s been rushed often ends up feeling cluttered despite having ample square footage.
Mapping Your Wardrobe Before Designing the Layout
Before finalizing your design, take stock of your current wardrobe and accessories. Count how many hanging items you have, separated into long garments like dresses and coats versus shorter items like shirts and pants. This inventory helps determine how much hanging rod length you’ll need versus folded storage space, ensuring the finished closet actually accommodates your real wardrobe rather than a generic estimate.
3: Make the Most of Natural Light
Using windows as a source of natural light can …
Budget Remodel a Kitchen: 7 Proven Tips to Save Money
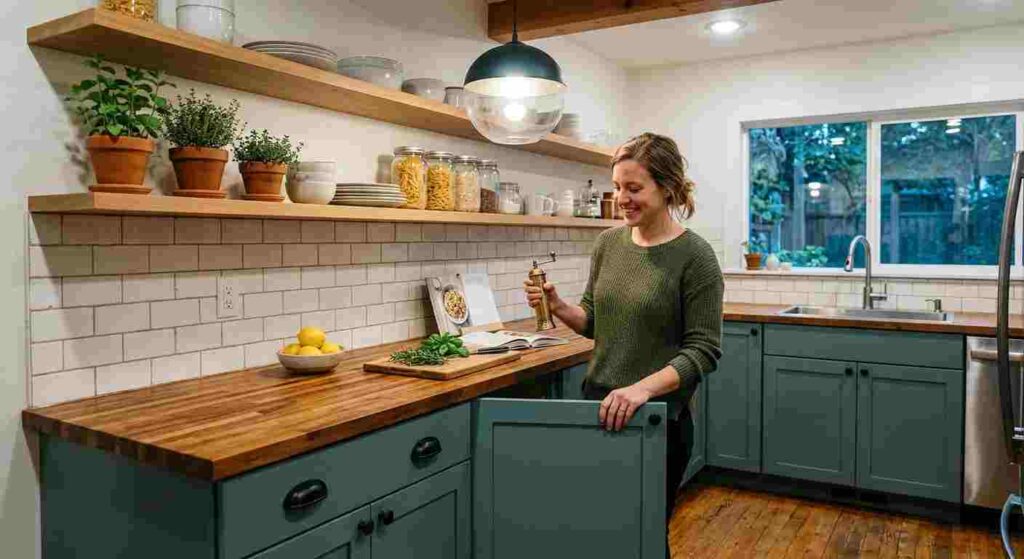
Many homeowners are reluctant to renovate their kitchen because of the potential expenses involved. Although a remodel can be a costly venture, the actual cost depends heavily on the approach taken throughout the project. There are several effective techniques you can apply if you’re working with a limited budget, allowing you to budget remodel a kitchen without sacrificing the quality of the finished result.
This guide walks through seven proven strategies for staying within a limited budget while still achieving a kitchen renovation you’ll genuinely be happy with.
Why a Limited Budget Doesn’t Mean a Limited Result
It’s a common misconception that a budget-conscious kitchen remodel automatically means settling for lower-quality materials or a less impressive final outcome. In reality, thoughtful planning, smart prioritization, and informed decision-making allow homeowners to achieve a meaningful transformation even with a modest budget.
The key lies in understanding where to focus your spending for maximum impact and where smaller, strategic compromises won’t significantly affect your day-to-day experience in the finished kitchen.
1: Prioritize Your Expenses
If you have limited resources to work with, you need to decide which renovation activities should take precedence over the rest. Reaching out to an established kitchen remodeling contractor can help you determine which areas you really need to focus on first, rather than spreading your budget thin across every appealing idea.
Identifying What Truly Matters Most
Start by separating your renovation wish list into essential, functional changes versus purely cosmetic upgrades. If your current layout creates genuine daily frustration, addressing that functional issue should take priority over a decorative backsplash or trendy hardware upgrade. This prioritization ensures your limited budget is allocated toward changes that will make the biggest difference in how your kitchen actually functions.
Getting Professional Input Early
A contractor experienced in budget-conscious kitchen renovations can often suggest practical alternatives you might not have considered, helping you achieve a similar visual or functional result at a lower cost. Bringing this expertise into the conversation early, before you’ve committed to specific materials or finishes, gives you the most flexibility to make smart tradeoffs.
2: Look Into Your Options
Conducting adequate research when searching for appropriate suppliers and contractors can go a long way in accommodating your budget. It’s worth noting that the cheapest option isn’t always the best choice for your specific needs. It’s essential to find an adequate balance between quality and affordability.
Comparing Multiple Suppliers and Contractors
Take the time to gather quotes from multiple suppliers for materials like cabinets, countertops, and flooring. Pricing can vary significantly between vendors for comparable products, and a bit of research upfront can uncover meaningful savings without requiring you to settle for a lower-quality material.
The same principle applies to contractors. Getting at least three written estimates allows you to compare not just pricing, but also the scope of work included, helping you identify which contractor offers the best overall value rather than simply the lowest number.
Avoiding the Trap of Choosing Based on Price Alone
An unusually low …
Turning Your Shed Into a Work Space: 7 Proven Steps

Telecommuting has become the standard for a large portion of the workforce since the start of the pandemic, and many homeowners are now looking for creative ways to separate work life from home life without the cost of a full home addition. Turning your shed into a work space is an excellent way to escape household distractions while creating a private, dedicated area where you can genuinely focus.
This guide walks through the key steps and considerations involved in turning your shed into a work space, from initial planning and layout to insulation, electrical work, and final finishing touches.
Why a Shed Office Has Become Such a Popular Solution
As remote and hybrid work arrangements have become permanent fixtures for many households, the demand for dedicated home office space has grown significantly. Not every home has a spare room available to convert into an office, which makes an existing backyard shed an appealing alternative. Turning your shed into a work space offers physical separation from the main house, helping create a clearer boundary between work hours and home life, something that’s often difficult to achieve when working from a kitchen table or shared living space.
Beyond the practical separation it provides, a shed office can also add long-term value to your property, particularly in today’s market where flexible workspace has become a desirable feature for many homebuyers.
1: Start With Planning and Layout
If you want to take a hands-on approach to this project, planning and layout is an excellent place to begin. This process fundamentally involves adapting your shed’s existing space according to your specific needs, rather than assuming the structure will function as an office without any reconfiguration.
Assessing Your Shed’s Current Condition
Before diving into design decisions, evaluate your shed’s existing structural condition, including the roof, flooring, and foundation. A shed that’s been used primarily for storage may need reinforcement or repair work before it’s suitable for regular daily use as a workspace. Addressing these structural basics first prevents costly surprises once you’ve already invested in finishing touches like flooring or built-in furniture.
Mapping Out a Functional Workspace
Once you’ve confirmed the shed’s structural soundness, think through how you’ll actually use the space day to day. Consider where your desk and computer setup will go relative to natural light from windows, where storage for files and supplies will be located, and whether you need space for video calls with a clean, professional-looking background. Taking measurements early and sketching a rough layout helps you avoid costly reconfiguration once construction or furnishing begins.
2: Address Insulation for Year-Round Comfort
Insulating your shed’s doors and windows can be accomplished with secondary glazing kits, which are widely available and relatively straightforward to install. Most DIY insulation kits come with supporting sheets that can be applied directly onto the shed’s existing windows and doors, offering a budget-friendly way to improve comfort without a full structural overhaul.
Why Insulation Matters More Than Homeowners Expect
A shed that isn’t properly insulated can become uncomfortably …
Kitchen Cabinet Remodel Options Without Full Replacement
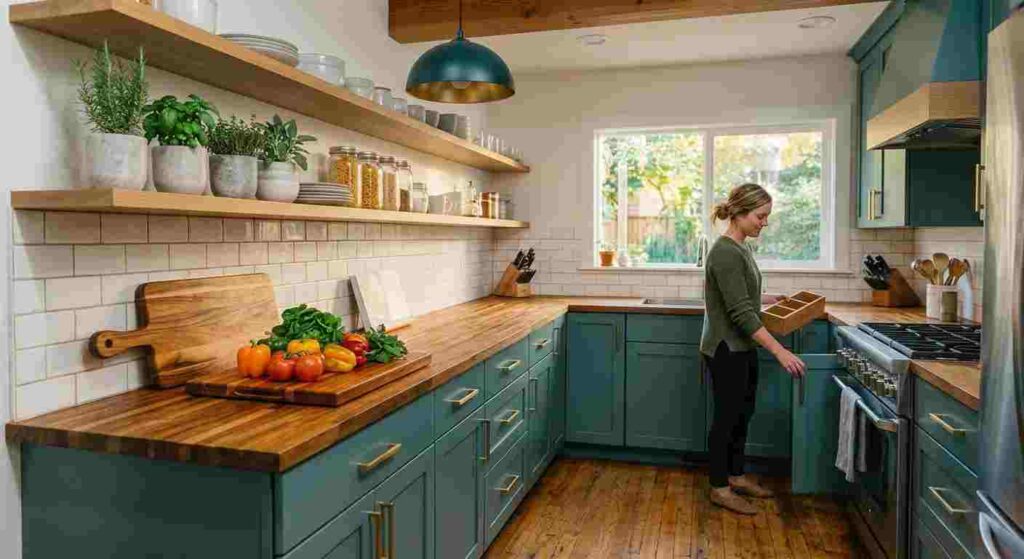
Cabinets are one of the most essential elements addressed during a kitchen renovation project. They make up a significant component of the room and are often one of the first things homeowners notice when they want to change the overall layout and design. Contrary to popular belief, remodeling your kitchen cabinets doesn’t have to be a costly endeavor. There are several practical kitchen cabinet remodel options available to homeowners looking to refresh their space without the expense of a full replacement.
This guide walks through seven proven, cost-conscious approaches to updating your kitchen cabinets, helping you choose the option that best fits your budget, timeline, and design goals.
Why Cabinet Remodel Options Are Worth Exploring Before Full Replacement
Cabinets typically represent one of the largest single expenses in a kitchen remodel, which makes them a natural place to look for cost savings without compromising the overall transformation of the space. Many homeowners assume that updating cabinets automatically means tearing everything out and starting over, but in most cases, the existing cabinet boxes are structurally sound and simply in need of a cosmetic refresh.
Understanding the full range of kitchen cabinet remodel options available helps you make an informed decision about where full replacement is genuinely necessary and where a more budget-friendly approach can achieve nearly the same visual impact.
Reface Your Cabinets
If the primary goal is simply changing the look of your cabinets, refacing is typically the most affordable option available. Experienced Newton MA kitchen remodeling specialists can work wonders with a fresh coat of paint or stain applied directly to your existing cabinetry, transforming the entire feel of the kitchen without the cost of new cabinet boxes.
How Cabinet Refacing Works
Refacing involves keeping your existing cabinet boxes in place while updating the visible surfaces, including doors, drawer fronts, and exposed sides, with a new finish or veneer. This approach offers a fast, cost-effective way of changing your cabinets while preserving the existing structure underneath, which is ideal when your current cabinet boxes are still solid and well-built.
Refacing works particularly well for homeowners who are happy with their current cabinet layout and configuration but simply want a more modern color, finish, or overall aesthetic. It’s worth noting that refacing isn’t the right choice for kitchens where the layout itself needs to change, since this option preserves the existing cabinet footprint rather than reconfiguring it.
Replace Just the Cabinet Doors
Another effective approach when looking to update your cabinets is replacing only the doors rather than the entire unit. Cabinet doors essentially function as the face of your cabinetry, which means swapping them out can give the impression of an entirely new set of cabinets at a fraction of the cost of full replacement.
Choosing New Door Styles
This option works well for homeowners looking to shift from a dated door style, such as ornate raised panels, to a cleaner, more contemporary shaker or flat-panel design. Pairing new doors with updated hardware, like modern handles and pulls, further …
How to Lower Your Renovation Expenses: 7 Proven Tips

Many homeowners shy away from remodeling because of the costs involved, but renovation projects don’t always have to be an overly expensive venture. Contrary to popular belief, opting for cheap products isn’t the only way to cut costs. There are several effective methods you can apply that will help you lower your renovation expenses while still ensuring the finished product represents genuine quality.
This guide walks through seven practical, proven methods homeowners can use to lower their overall renovation expenses without compromising on the results they’re hoping to achieve.
Why Cutting Costs Doesn’t Have to Mean Cutting Quality
There’s a common misconception that the only way to lower your renovation expenses is to settle for inferior materials or rush the work itself. In reality, smart budgeting, careful planning, and informed decision-making can reduce costs significantly while still delivering a finished space that looks and functions exactly the way you envisioned.
The key lies in understanding where your money truly makes a difference and where it doesn’t. With the right approach, you can prioritize spending on the elements that matter most while finding genuine savings elsewhere, all without sacrificing the overall quality of your renovation.
1: Contact an Established Contractor
Leading home remodeling companies have the ability to offer their clients attractive discounts when handling major projects, particularly for homeowners who bundle multiple renovation needs into a single contract. These discounts can greatly ease the overall spending involved without affecting the quality of the services you receive.
Why Established Contractors Often Offer Better Value
Contractors with strong supplier relationships and consistent project volume frequently have access to bulk pricing on materials, appliances, and fixtures that smaller or less established companies simply can’t match. These savings are often passed along to clients, particularly on larger renovation projects where material costs make up a significant portion of the total budget.
Working with an experienced, established contractor also reduces the likelihood of costly mistakes that come from inexperience, which is one of the most overlooked ways homeowners end up spending more than necessary on a renovation. A contractor who gets the work right the first time avoids the added expense of redoing improperly completed tasks, ultimately protecting your budget over the course of the project.
Asking About Available Discounts and Promotions
Many remodeling companies offer seasonal promotions, referral discounts, or reduced rates for homeowners willing to schedule work during their contractor’s slower season. It’s always worth asking directly about any available discounts or flexible scheduling options that could help lower your renovation expenses without affecting the scope or quality of your project.
2: Prioritize Your Needs
When making remodeling plans, it’s essential to start from the most essential changes and work toward the least. This approach ensures your budget isn’t wasted on unnecessary elements that don’t add any true value to the space involved. Practical needs should consistently be given priority over purely aesthetic aspects when budget constraints come into play.
Distinguishing Between Needs and Wants
Before finalizing your renovation plans, separate your wish …