How to Choose a Kitchen Remodeling Contractor: A Complete Guide for Homeowners

Kitchen Remodel Survival Guide: Stay Sane, On Budget & In Control
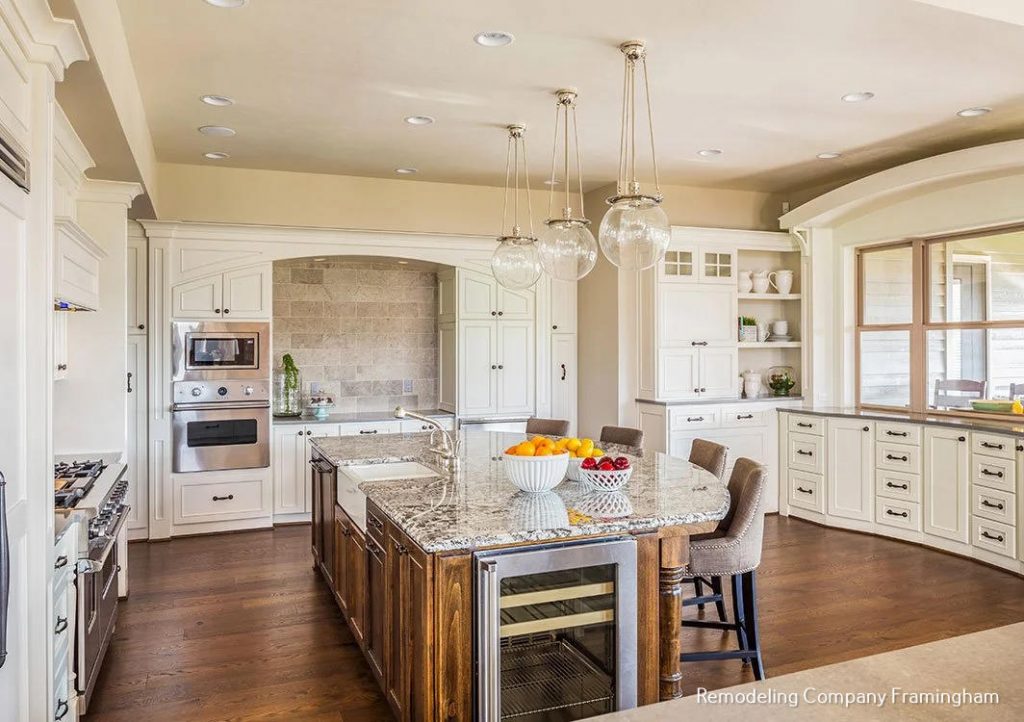
The demo crew arrives Monday. By Tuesday afternoon, your kitchen — the room where your household actually runs — is a gutted shell of exposed studs and disconnected plumbing. You knew it was coming, and yet nothing quite prepares you for the physical reality of living without your kitchen for weeks on end.
The difference between homeowners who come through a kitchen renovation energized and those who come out depleted almost always comes down to one thing: how well they prepared before the first hammer swung.
This guide gives you everything you need to plan smarter, protect your home, manage your budget, and maintain your household’s sanity from demo day through the final walkthrough.
Kitchen Remodel Planning: The Foundation That Determines Everything
A successful kitchen remodel begins with a detailed pre-construction plan that defines the project scope, timeline, material selections, and communication structure before any demolition starts. Decisions made — or delayed — in the planning phase are the primary driver of cost overruns and schedule extensions.
The most common mistake homeowners make is treating planning as a formality before the “real” work begins. In reality, planning is where the project is either set up to succeed or quietly positioned to fail. Every week of thorough upfront preparation can save two weeks of reactive problem-solving mid-renovation.
Define the Scope Before You Touch a Cabinet
Walk through every aspect of the renovation with your contractor in explicit detail:
- Which walls are being opened or removed?
- Are plumbing or electrical lines being relocated?
- What flooring is being replaced?
- Which appliances are being swapped or upgraded?
Ambiguity in scope is the single greatest predictor of change orders — and change orders are how kitchen remodel budgets quietly double. Ask your contractor to provide a phase-by-phase project schedule covering demolition, rough plumbing/electrical, cabinet installation, countertop templating, fabrication, tile work, and finishing.
Order Materials Before Construction Starts
Supply chain variations continue to shape home renovation timelines. Cabinet lead times from many manufacturers can run anywhere from 8 to 14 weeks (National Kitchen & Bath Association). Countertop fabrication typically adds another 2 to 3 weeks after cabinet installation. Specialty tile, imported fixtures, or custom hardware can extend those windows further.
The smartest contractors will not schedule a project start date until all long-lead materials are confirmed, ordered, and have estimated delivery windows. If you are working with a contractor who wants to begin before materials are secured, treat that as a major warning sign.

How to Set Up a Temporary Kitchen That Actually Works
Most kitchen remodels take 6 to 12 weeks from demolition to completion. Setting up a functional temporary kitchen in another room before construction begins is not optional — it is the infrastructure that keeps your household running and prevents thousands of dollars in unnecessary restaurant spending.
The goal is not to replicate your full kitchen. It is to cover the essential functions: hot beverages, reheated meals, and basic food storage. A surprisingly capable temporary setup can be assembled in a spare room, …
Emergency Roofing Services You Can Trust: How Exponential Construction Corp. Protects Your Home When It Matters Most


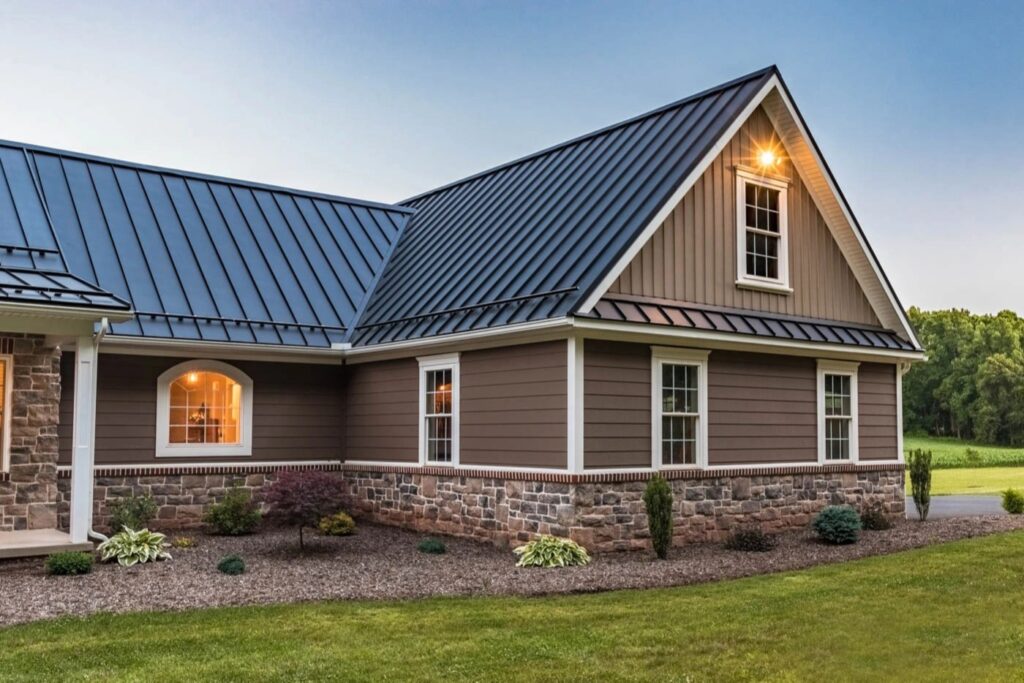
Best Types of Metal Roofing for Homes — And How to Pick the Right One

It starts quietly. A water stain on the ceiling after a heavy storm. An energy bill that climbs every summer despite nothing changing inside the house. Then the roofer’s assessment: your asphalt shingles have maybe three to five years left — and this won’t be the last time you replace them.
For homeowners who have been through one roof replacement already, that moment triggers a different question entirely: what if you installed a roof you never had to replace again? Understanding the types of metal roofing for residential homes is where that answer begins.
Why Residential Metal Roofing Has Replaced Asphalt as the Smart Long-Term Choice
Residential metal roofing refers to any roofing system using steel, aluminum, copper, or zinc panels designed for single-family and multi-family homes. It outperforms asphalt on lifespan, weather resistance, energy efficiency, and total cost of ownership — typically lasting two to four times longer than traditional shingles.
The average asphalt shingle roof requires full replacement every 15 to 20 years (Asphalt Roofing Manufacturers Association). A professionally installed metal roof lasts 40 to 70 years depending on the material — meaning most homeowners who make the switch will never replace their roof again. Over a 60-year ownership horizon, that difference in replacement frequency represents a substantial cost advantage, even when accounting for the higher initial installation cost.
Beyond longevity, the thermal performance of metal is a compelling financial argument on its own. Metal roofing’s reflective surface reduces solar heat absorption by up to 25%, directly lowering cooling loads and monthly utility costs (Oak Ridge National Laboratory). In climates with hot summers and harsh winters — like the northeastern United States — that thermal efficiency compounds across every billing cycle for the life of the roof.
The 5 Primary Types of Metal Roofing for Residential Properties
To help you evaluate the best fit for your home’s architecture and regional climate, here is how the primary residential metal roofing systems compare:
| Metal Roof Type | Average Lifespan | Best Suited For | Key Advantage |
| Standing Seam | 50 – 70 Years | Modern & contemporary homes | Maximum leak resistance with concealed fasteners. |
| Corrugated Panels | 30 – 45 Years | Outbuildings, cabins, & budget builds | Most cost-accessible entry point into metal roofing. |
| Stone-Coated Steel | 50+ Years | Suburban neighborhoods (HOA compliant) | Traditional look of tile/slate with industrial strength. |
| Aluminum | 50 – 70 Years | Coastal areas & high-salt environments | Inherently rust-proof and highly corrosion-resistant. |
| Copper & Zinc | 100+ Years | Historic restorations & luxury custom builds | Generational longevity; develops a self-protecting patina. |
Note: The average lifespans listed above are industry benchmarks based on standard environmental conditions and proper, manufacturer-certified installation. In regions like Massachusetts and the broader New England area, actual roof longevity can be heavily influenced by micro-climates — such as severe winter snow-loads, heavy coastal salt-air exposure, and high seasonal humidity. Additionally, maximizing these lifespans requires the use of high-temperature synthetic underlayments, balanced attic ventilation systems, and routine annual clearings of debris from valleys and gutters.
1. Standing Seam: The Gold Standard for Modern
…The Moment You Search “Backyard Remodel Near Me”: A Story Every Homeowner Relates To

Residential Roofing Repair: The Hidden Home Problem Most Homeowners Ignore (Until It’s Too Late)

Residential Roof Construction: XP Constructions Complete Guide to Residential Homes


Do You Need a Permit to Remodel a Kitchen? XP Construction Explains
How Long Does a Kitchen Remodel Take? A Simple and Clear Explanation
A common question homeowners ask before starting a renovation is, how long does a kitchen remodel take. The answer depends on the size of the project, the design choices, material availability, and whether plumbing, electrical, or structural updates are involved. In most cases, the full process can take anywhere from a few weeks for construction to a few months when planning, ordering materials, and finishing details are included. Knowing what affects the timeline can help you plan better, avoid surprises, and keep your kitchen remodel moving as smoothly as possible.
Planning and Design Stage
Each kitchen renovation begins with preparation and planning, which typically requires one to four weeks based on how rapidly selections are made. Around this time, the homeowners pick on the kitchen design, cabinetry style, countertops, backsplash, carpeting, decoration, and the appliances. When you currently know what you prefer, organizing is easier. If you are continuing to investigate ideas or choosing custom products, it might take more time.
Ordering Materials Stage
After the planning comes the purchase stage, which can significantly affect the time frame. Some items ship quickly, but custom cabinets, counters, and specific tiles may require two to eight weeks to be manufactured and delivered. Building may not begin after the essential ingredients are on-site. Beginning too early without supplies can halt the undertaking. Early purchasing helps keep the construction on track and makes the rest of the procedure proceed effortlessly.
Demolition Stage
Demolition is the process of removing the old kitchen and usually takes three to seven days. Employees take out cabinets, counters, sinks, flooring, and kitchen appliances. Occasionally, unforeseen problems, like mold, water damage, old wiring, or uneven floors, are identified. Correcting these issues adds additional time but is vital for security and long-term longevity. A skilled contractor guarantees that demolition and any needed maintenance are done correctly, readying the area for the next stage of construction.
Plumbing and Electrical Stage
Following demolition, heating and electrical work will start. This stage typically takes one to three weeks based on the quantity of work needed. Simple updates take less time, but moving sinks, adding lights, upgrading electricity systems, or shifting appliances can extend the schedule. Plumbing and electrical work often requires city inspections, which can sometimes lead to small delays.
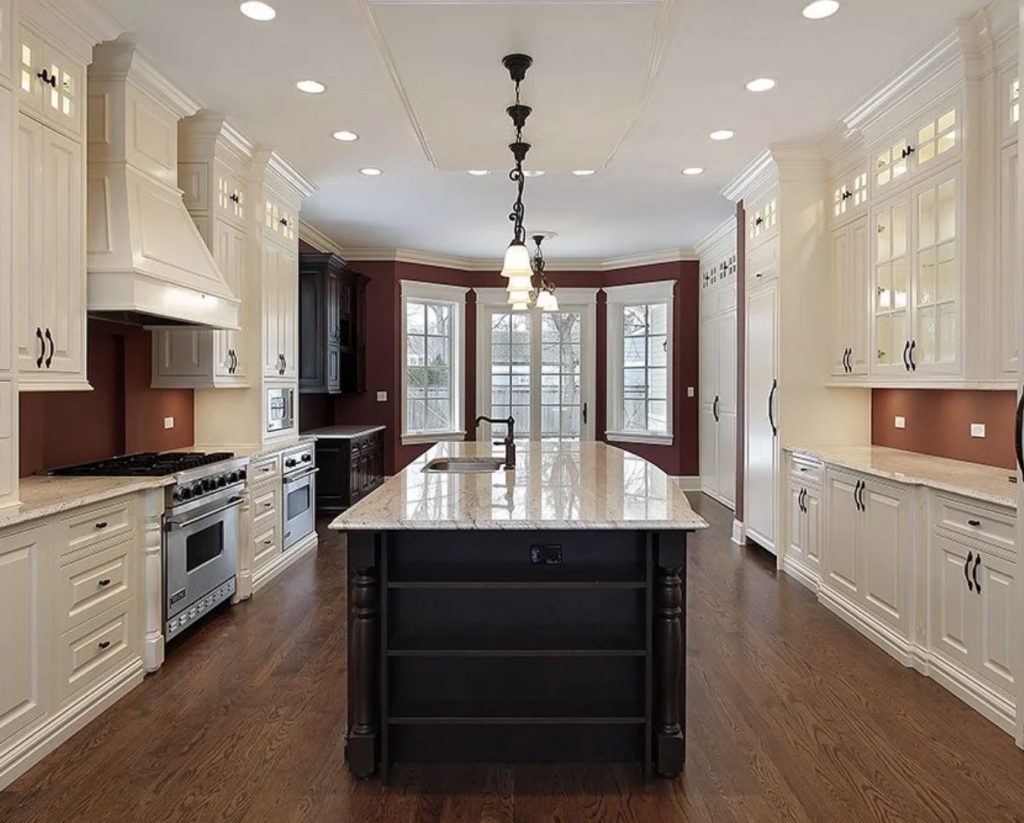
Installation Stage
Installation is the longest stage of a kitchen remodel, taking three to six weeks. Cabinet installation usually takes several days and must be precise so cabinets are level. Countertops, especially stone options like granite or quartz, are measured and installed after cabinets, which can take one to three weeks depending on the supplier. Flooring is installed either before or after cabinets, depending on the type, with tile floors taking longer than laminate or vinyl. Finally, backsplashes are added, appliances are fitted, sinks are connected, and adjustments are made. Because each step depends on the previous one, this stage requires careful timing.
Finishing Touches Stage
The last stage typically takes three to seven days and involves coloring walls, putting in cupboard handles, …
Home Remodel Checklist Every Homeowner Needs: 10 Planned Steps to Transform Your Space
A solid home remodel checklist is the single most powerful tool you can have before picking up a hammer or calling a contractor. Without one, even a straightforward residential renovation can quickly spiral into missed deadlines, blown budgets, and long-term design regret.
The good news? Planning a successful home renovation does not have to be an overwhelming or complicated ordeal. Whether you are tackling a full-scale kitchen remodel, a master bathroom upgrade, or adding a structural outdoor deck, these 10 structured steps will keep your residential project perfectly on track from day one to the final quality walkthrough.
Expert architectural insight throughout this guide comes directly from Exponential Construction Corp., one of Massachusetts’ most trusted names in residential remodeling, high-end construction, and spatial design since 2019.
Why a Home Remodel Checklist Makes All the Difference
Residential renovations fail most often not because of a lack of design ideas or bad luck — they fail because of poor initial planning and weak phase coordination. A structured home remodeling checklist forces you to think through every physical and financial stage before money is spent, structural walls are opened, or old fixtures are torn down.
Here is what a proper, professional renovation planning checklist helps you avoid:
- Budget Overruns: Caused by an undefined or constantly expanding project scope mid-construction.
- Permit Violations: Which can result in heavy municipal fines, forced structural demolition, or legally halted construction lines.
- Design Regrets: Stemming from skipping the critical layout optimization and material compatibility phase.
- Contractor Disputes: Rooted in unclear job site expectations, vague milestones, and unitemized financial estimates.
The 10 Planned Steps to Transform Your Space
To guide your residential renovation seamlessly from concept to completion, follow this master sequential framework meticulously engineered by experienced building professionals.
1.Define Your Remodeling Goals Clearly:Pre-Planning Phase.
Every successful home improvement project begins with an uncompromised vision. Sit down and separate your non-negotiable must-haves from your aesthetic nice-to-haves. Determine if you are remodeling primarily for daily functional comfort or to maximize future real estate resale value, and document any foundational structural or safety issues that require immediate attention.
2.Build a Realistic Home Renovation Budget:Financial Planning Phase.
Break your residential renovation budget into four distinct, unblended categories: design/architectural fees, premium raw building materials/fixtures, professional field labor costs, and municipal permit/inspection fees. Always inject a mandatory 10% to 15% financial contingency buffer on top of your estimated total to seamlessly absorb unforeseen structural surprises behind walls.
3.Hire a Certified, Licensed Contractor:Vetting Phase.
Evaluate regional builders based on stringent verification rules. Demand proof of a valid Massachusetts Home Improvement Contractor (HIC) registration, a Construction Supervisor License (CSL), and comprehensive general liability insurance. Prioritize companies that provide clear, itemized line-item pricing sheets and display strong local portfolios with verified references across your market.
4.Finalize Your Architectural Design and Layout:Design & Blueprint Phase.
Collaborate closely with your contractor to draft technical layouts and immersive 3D digital mock-ups. Focus intensely on space traffic flow, structural wall viability, natural light optimization, …
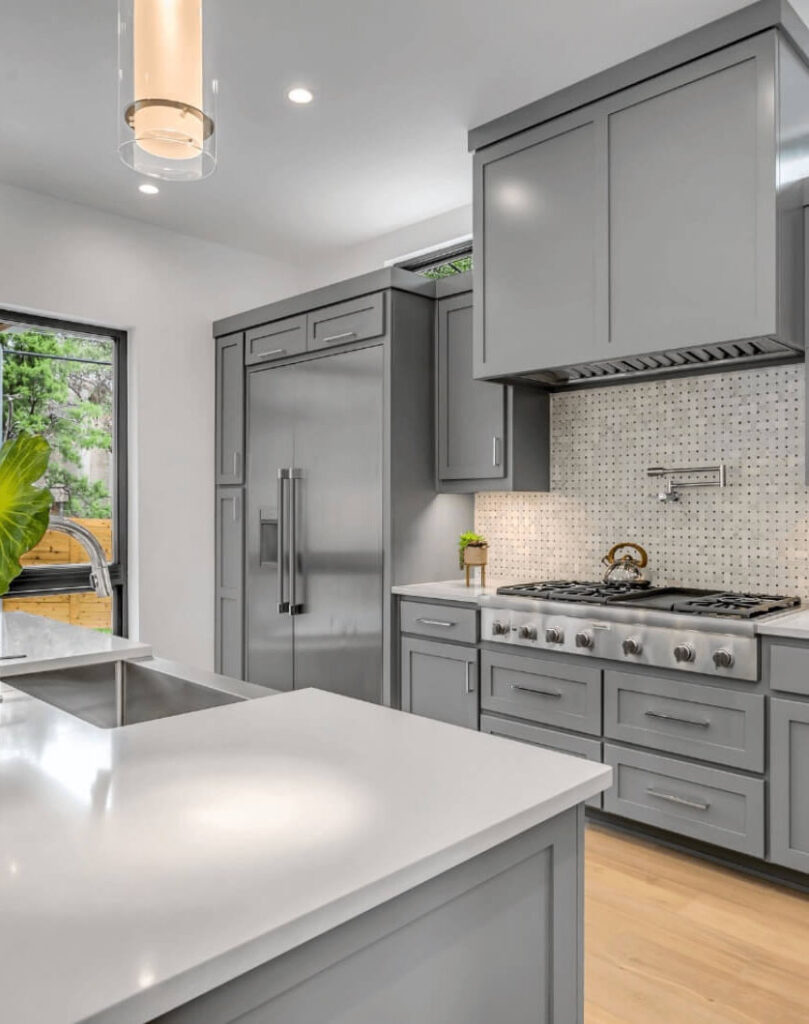
When Remodelling a Kitchen What Comes First?

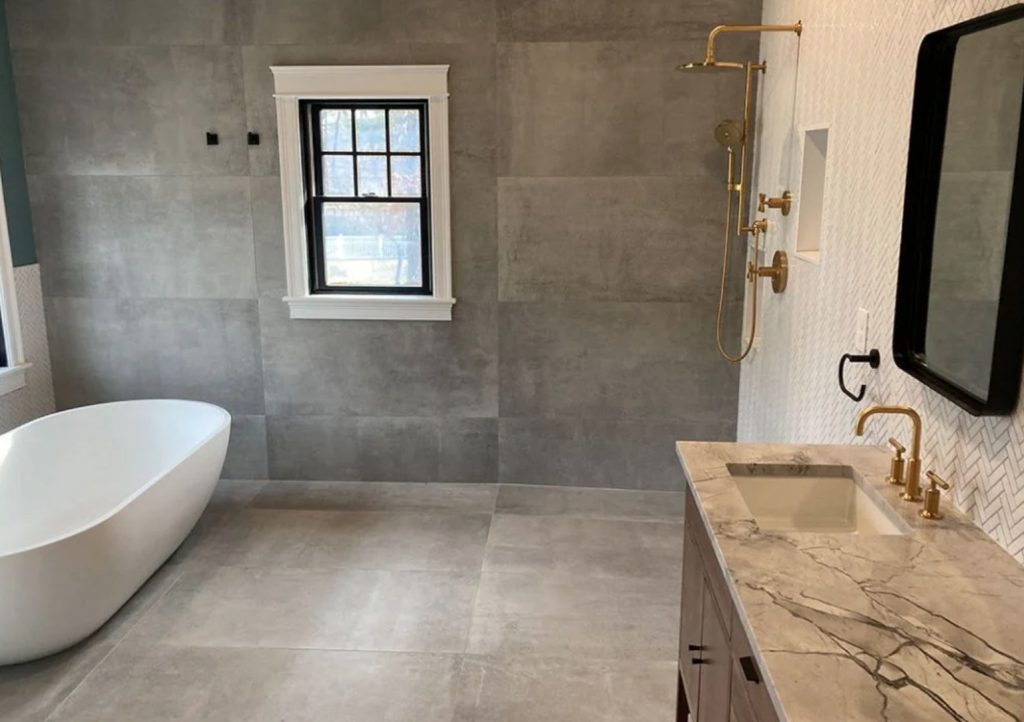
How Long Does It Take to Remodel a Small Bathroom?